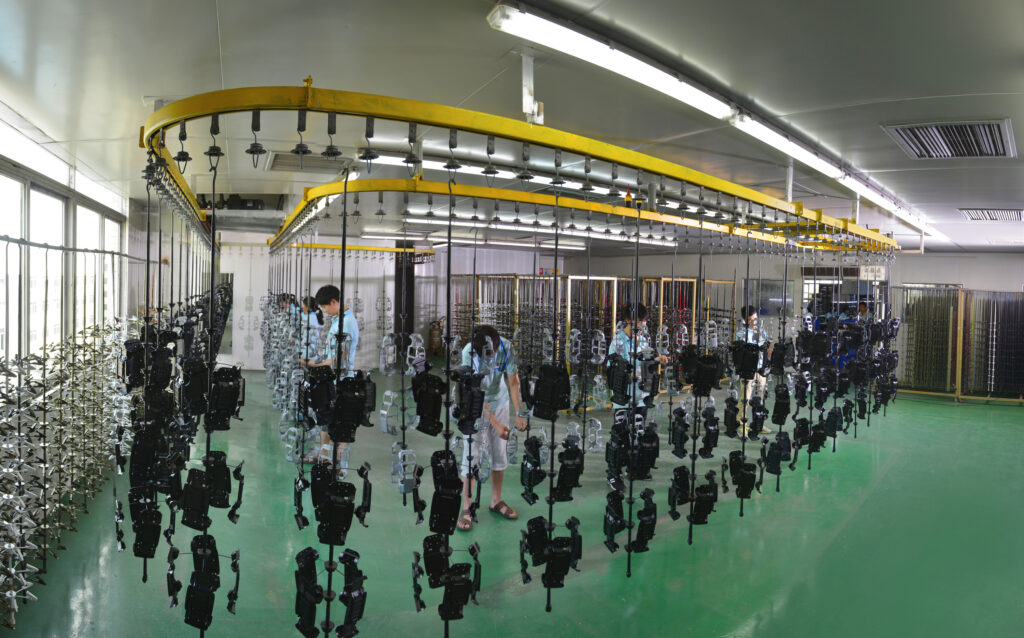
Our paint spraying department utilizes a fully automated electrostatic spraying process that mirrors the techniques used in real vehicle painting. Currently, we have 3 fully automated electrostatic spraying systems in operation, allowing us to cater to diverse customer requirements by applying various colors and logo designs.
Each model undergoes a spraying process of 3 to 4 times to ensure high-quality results. This setup enables our department to achieve impressive production capacities, with a daily output of 2,600 sets and a monthly total of 62,000 units.
Pad printing
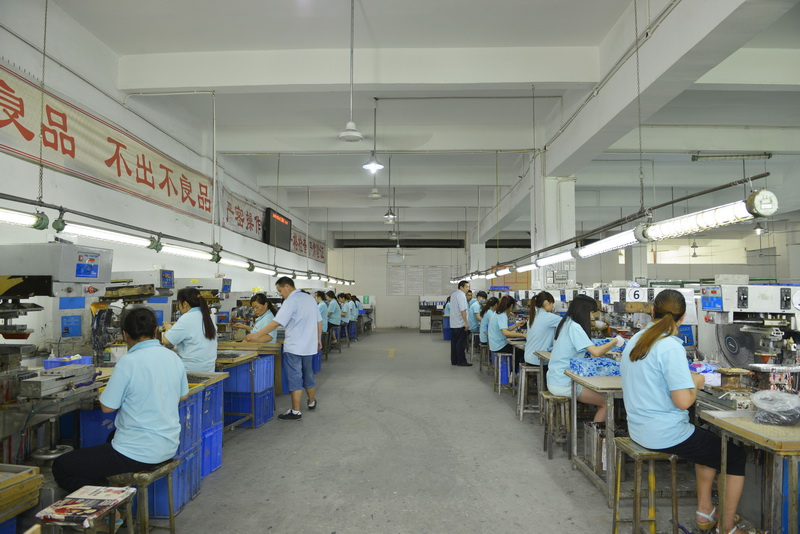
The pad printing process allows for high-precision printing on items such as vehicle interiors, buttons, or small decorative elements. The main responsibilities of the Pad Printing Group include preparing and mixing inks, setting up the printing plates, ensuring consistent print quality, and conducting inspections to ensure all prints meet the required standards.
Our factory have 55 pad printers, including single-color, two-color, and four-color machines. All decorative designs are completed through the pad printing process. For glass components, the printing is done in a dust-free workshop to ensure high-quality and precise results.
Spraying technology
Fully Automated Electrostatic Spraying
Advantages
Same process as the real vehicle painting
Electrostatic spraying utilizes a specialized metal spray head with sharp edges that is charged with high-voltage negative electricity.
During operation, a centrifugal force atomizes the paint into negatively charged particles as it reaches the edge of the rotating disc.
These particles are then propelled toward the positively charged workpieces. The opposing charges create a magnetic effect, ensuring the paint particles are evenly distributed across the surface of the workpiece, forming a smooth and uniform paint layer.
This process mirrors the technology used in full-scale automotive production, guaranteeing a high-quality, durable finish.
High Paint Utilization: With minimal paint and solvent dispersion, paint efficiency reaches over 95%, ensuring that almost all of the coating material is used effectively.
Improved Work Environment: The reduction in airborne chemicals significantly decreases pollution, contributing to a safer and cleaner working environment for operators.
Automation and Mechanization: The paint spraying process is fully mechanized and automated, enhancing consistency and reducing manual labor while improving overall production efficiency.
Superior Coverage and Precision: Thanks to the influence of the electric field, the paint is atomized into finer particles, allowing even edges and side surfaces of parts to be coated smoothly. This also prevents paint buildup along surface edges, resulting in a more uniform finish.
Painting Process
The pad printing process allows for high-precision printing on items such as vehicle interiors, buttons, or small decorative elements. The main responsibilities of the Pad Printing Group include preparing and mixing inks, setting up the printing plates, ensuring consistent print quality, and conducting inspections to ensure all prints meet the required standards.
Our factory have 55 pad printers, including single-color, two-color, and four-color machines. All decorative designs are completed through the pad printing process. For glass components, the printing is done in a dust-free workshop to ensure high-quality and precise results.
1. Ultrasonic Cleaning
2. Vibration Grinding
After all alloy parts enter the paint spraying department, they undergo an ultrasonic cleaning process. This step is essential for removing surface oxides, such as dirt, grease from the alloy surfaces. By ensuring the parts are thoroughly cleaned, t removing surface oxides, such as dirt, grease from the alloy surfaces, resulting in better color coverage and finish.
After cleaning, the metal parts are placed into vibrating machines, where they undergo a polishing process through the friction between the alloy parts and terrazzo. This vibration-induced abrasion helps to smooth the surface of the alloy, enhancing its overall finish and preparing it for further treatments.
3. Phosphating
4. Baking
All alloy parts undergo a phosphating treatment, which is a crucial step in the surface preparation process. This treatment involves chemically softening the surface of the alloy parts, creating a phosphate coating that significantly enhances the adhesion of subsequent oil layers. By improving the surface’s texture and increasing its ability to bond with protective coatings, phosphating ensures better corrosion resistance and durability, making it an essential step in achieving high-quality finishes for the parts.
All parts are placed in an oven at 130°C for 30 minutes. This step primarily serves as a quality control measure to filter out potentially defective parts. If any alloy parts develop surface issues such as orange peel, texture or cracks during baking, they are immediately marked for scrapping to prevent them from proceeding to the next stage of production. This process ensures that only defect-free parts continue to subsequent operations, thereby maintaining product integrity and minimizing future quality risks.
5. Racking
6. Lint Removal
All components are securely mounted onto specialized hanging racks to ensure they are properly aligned for entry into the automated spraying conveyor system. This step is crucial for maintaining consistent coating coverage during the automated painting process.
A flame gun is used to burn off any lint clinging to workpieces mounted on racks. Afterward, an air gun is employed to blow away any remaining dust and particles, ensuring the surface is clean and free from contaminants before proceeding with painting treatment.
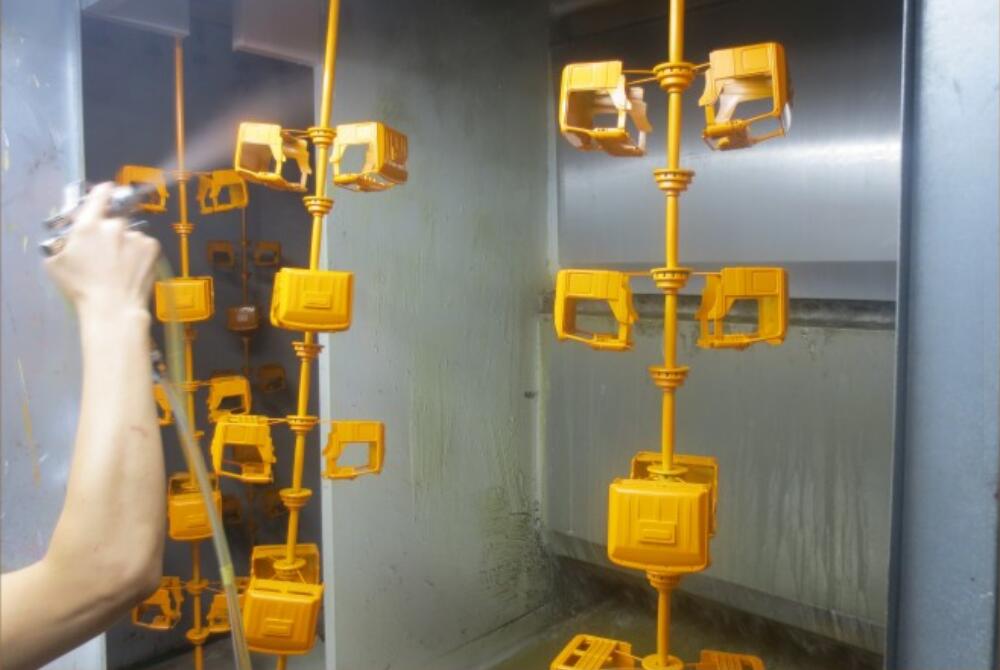
7. First Electrostatic Spraying
8. First Touch-up
During this stage, parts are transported along a designated track into the automated painting line, where the initial electrostatic spraying takes place. A base coat is applied, which is typically a color closely matched to the final topcoat, providing an even foundation for subsequent layers. The use of electrostatic technology ensures efficient and uniform paint adhesion, minimizing waste and enhancing overall coating quality.
After the electrostatic spraying, some concealed areas may not receive adequate coverage, resulting in uneven coloration. To address this issue, we implement a manual touch-up technique. This process involves skilled technicians applying paint to these specific areas, ensuring a more uniform finish and enhancing the overall aesthetic quality of the models. By carefully blending the touch-up paint with the surrounding surfaces, we achieve a consistent appearance that meets our stringent quality standards.
9. Pre-Baking Leveling
10. Initial Baking
Following the application of the paint spray, a crucial automatic leveling process is implemented, which lasts for 30 minutes. This step allows the paint to self-level, resulting in a smoother surface finish. By providing sufficient time for the leveling process, we enhance the visual and tactile quality of the coated surface, ensuring a uniform appearance that is essential for optimal adhesion and aesthetics during the subsequent baking stage. This meticulous approach not only improves the overall quality of the final product but also minimizes potential defects, such as uneven textures or imperfections in the paint layer.
All coated components are transferred into a fully automated baking oven set at a temperature of 120 degrees Celsius.
The baking cycle lasts for 30 minutes, ensuring optimal adhesion of the coating to the substrate.
This step is crucial for achieving the desired finish and enhancing the durability of the painted surface.
11. Second Touch-up
12. Second Electrostatic Spraying
Prior to the application of the second layer of paint, areas that are difficult to coat uniformly undergo a manual touch-up. This step ensures even coverage, particularly in hard-to-reach or intricate surfaces, preparing the part for the subsequent layer of paint.
During the second electrostatic spraying stage, a high-quality topcoat is applied to the parts, ensuring a smooth and even finish.
13. Pre-Baking Leveling
14. Second Baking
Following the application of the paint spray, a crucial automatic leveling process is implemented, which lasts for 30 minutes.This step allows the paint to self-level, resulting in a smoother surface finishing
All coated components are transferred into a fully automated baking oven set at a temperature of 130 degrees Celsius.The baking cycle lasts for 30 minutes.
15. Third Electrostatic Spraying
16. Pre-Baking Leveling
In the third stage of electrostatic spraying, parts are directed onto an automated spraying track for the application of a clear gloss coat. This layer of high-gloss transparent paint is applied to enhance the surface’s overall luster and ensure a refined, polished finish. The gloss coat provides both aesthetic improvement and added protection, resulting in a durable, high-quality shine that elevates the visual appeal of the final product.
Following the application of the paint spray, a crucial automatic leveling process is implemented, which lasts for 30 minutes.This step allows the paint to self-level, resulting in a smoother surface finishing
17. Third Baking
18. Offloading
All coated components are transferred into a fully automated baking oven set at a temperature of 150 degrees Celsius.The baking cycle lasts for 30 minutes.
Once the workpieces have been successfully painted, they are carefully removed from the racks and systematically placed into turnover trays for organized storage.
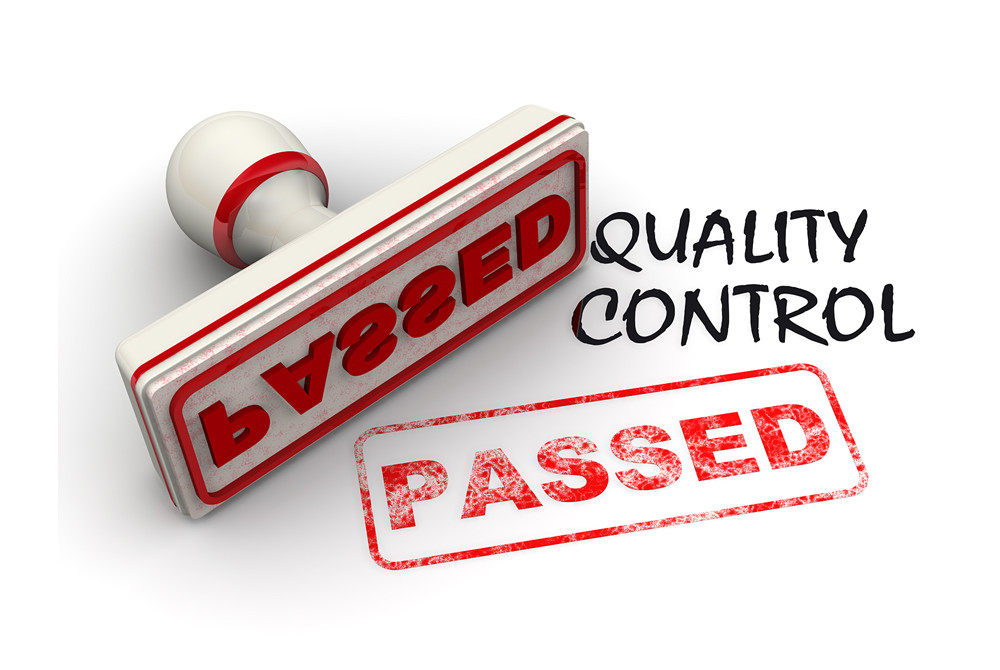
19. QC Inspection
20. Polishing Treatment
After the completion of electrostatic spraying, our QC carry out inspections based on established acceptance criteria. Only parts that meet the quality standards are approved to move on to the next stage of production. Defective items are classified as scrap and handled accordingly.
In order to achieve a more lustrous surface finish, all parts undergo a polishing process using a high-speed buffing machine. This step ensures that the components are polished to a high sheen, enhancing both their visual appeal and surface smoothness, which contributes to a premium-quality finish.
21. Waxing Treatment
22. QC Inspection
The water wax treatment is carried out using a high-speed polishing machine. This process is polishing at high speeds to achieve a smooth, glossy finish. The use of water wax helps enhance the surface’s shine while providing a protective coating that improves the durability of the part. T
After the completion of electrostatic spraying, our QC carry out inspections based on established acceptance criteria. Only parts that meet the quality standards are approved to move on to the next stage of production. Defective items are classified as scrap and handled accordingly.
23. Manual Spray Painting
24. Pad Printing
For decorative areas in small or intricate regions, custom spraying molds are created to ensure precise paint application. The paint is then applied manually by skilled operators to ensure uniform coverage and high-quality finish in these localized areas. This method allows for detailed control over the spray pattern, essential for complex or delicate designs.
Pad printing is a process that uses a silicone pad and a steel plate to transfer decorative designs onto parts or surfaces of diecast scale models. Depending on the complexity and length of the design, this process can involve either single or multiple transfers. Pad printing is commonly used for creating logos and other decorative patterns on a variety of materials.
25. Screen Printing
26. Touch-up
For large, flat parts, we utilize screen printing technology to create the necessary decorative surfaces.
This method ensures precise and consistent application of designs or markings across the surface, making it ideal for producing high-quality finished scale models.
For areas that are difficult to reach during spray painting or pad printing, we use a manual touch-up process. Skilled workers carefully apply paint by hand to these sections, adding decorative details. After the touch-up, any excess paint or smudges around the decorations are meticulously wiped away to ensure a clean and polished surface.
27. Baking
28. QC Inspection
After the pad printing and touch-up processes are completed, the parts are placed in an oven set at 100°C and baked for 30 minutes. This step is critical for enhancing the adhesion of the decorative areas, ensuring a more durable and long-lasting finish. The controlled heat exposure allows the inks and pigments to bond more effectively with the surface of the parts, improving both the visual quality and resistance to wear.
In our paint spraying and pad printing processes, each step undergoes stringent quality control by our dedicated inspection team. Only products that meet the required quality standards are approved to move forward to the next stage of production. This ensures that every component maintains the highest level of precision and finish.
Experience Excellence in Every Coat!
—Our state-of-the-art paint spraying technology ensures flawless finishes and unmatched quality for your products. Elevate your standards with us!—